
Pixlr E is a favorite Photoshop-alternative online program. There are in-app purchases and ads on the side but all those will not require you to commit. You can safely ignore them and still enjoy working with Pixlr E. The tutorial below will get you started using Pixlr E.
First of all, you need to sign up with your email to use Pixlr E. After that, you are good to go.

In this tutorial, we are going to make a design similar to the image above. In the process, we will learn how to:
- Start with a new empty file
- Insert an image from the Internet
- Add texts and change its properties such as Fill Color, Outline, and Shadow
- Add a Shape and change some of its properties
- Work with the Layers panel such as Opacity
- Save and download our work as JPEG
Let’s start.
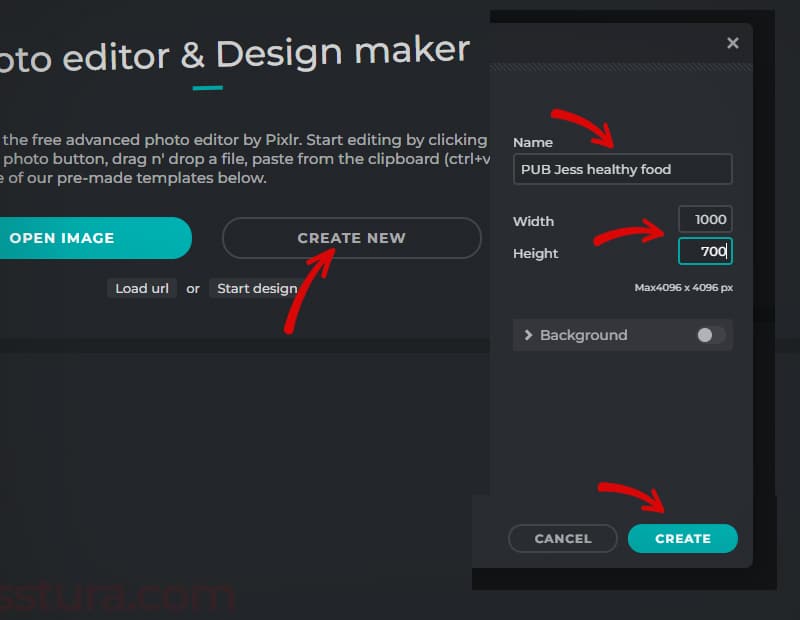
Step 1: Make a new file
Click the Create New button. Give it a good name. The dimension can be 1000×700 pixels.
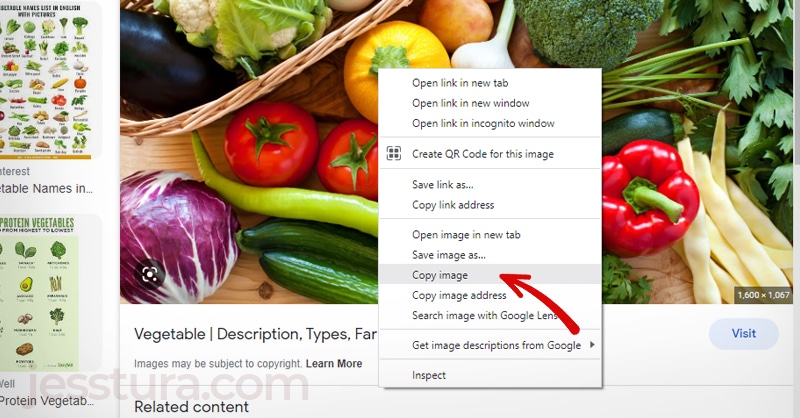
Step 2: Insert the image (copy-paste)
Search an image from the Internet similar to the sample photo. From the Search results, click the image you want and do right-click then Copy image (or similar to that). Go back to your Pixlr E and do Ctrl+V.
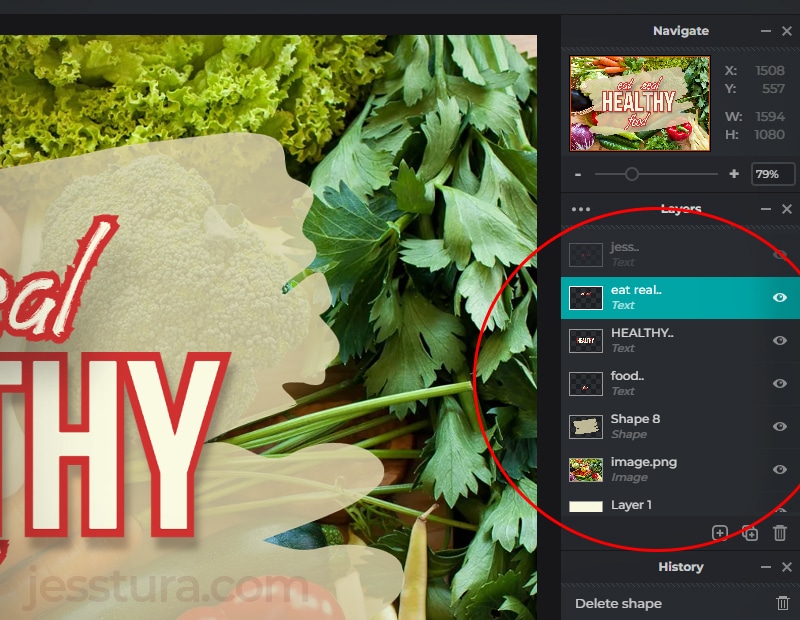
You should have two layers by now in your Layers panel at the right side of your screen: the layer1 and the image layer.
Step 3: Add Texts
Click the Text tool, click on the canvas, then click Add Text. Type ‘HEALTHY’ then set properties accordingly. The fonts used in the example are Aiden and Bebasneue. The Text tool needs to be selected so that its corresponding properties are shown.
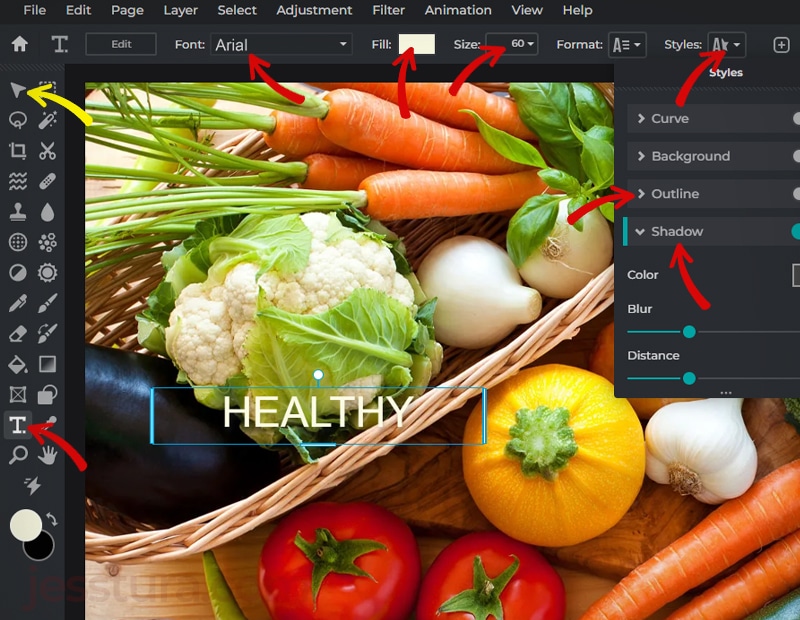
Click the Arrange tool (pointed by yellow arrow) once you are done with your texts.
Keep adding more texts for the words ‘eat real’ and ‘food’.
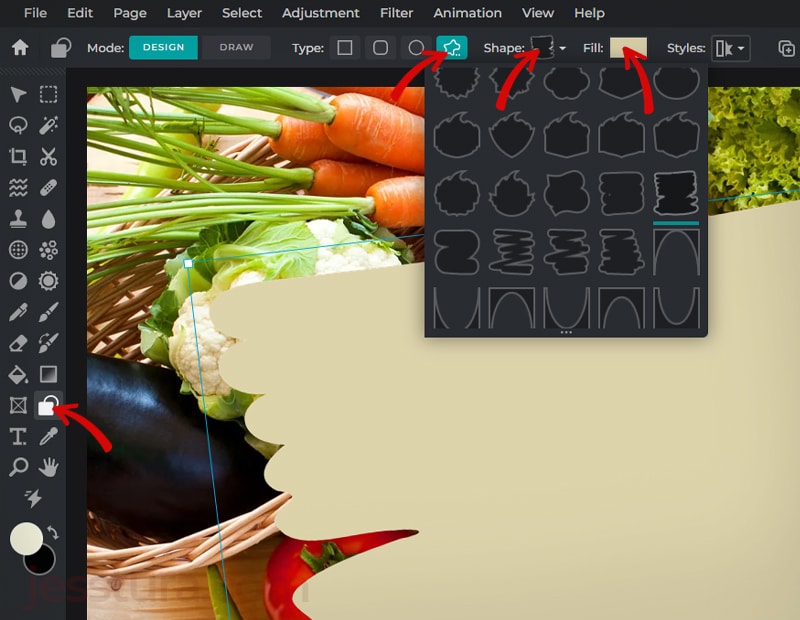
Step 4: Add a Shape layer as background for the texts
Click the Shape tool, then set its properties such as Fill Color, Shape Style pointed by the red arrows. Then draw the shape on the canvas.
Step 5: Work with Layers and Opacity
Click the Shape layer in the Layers panel, then click the three dots, the move the Opacity slider as desired.
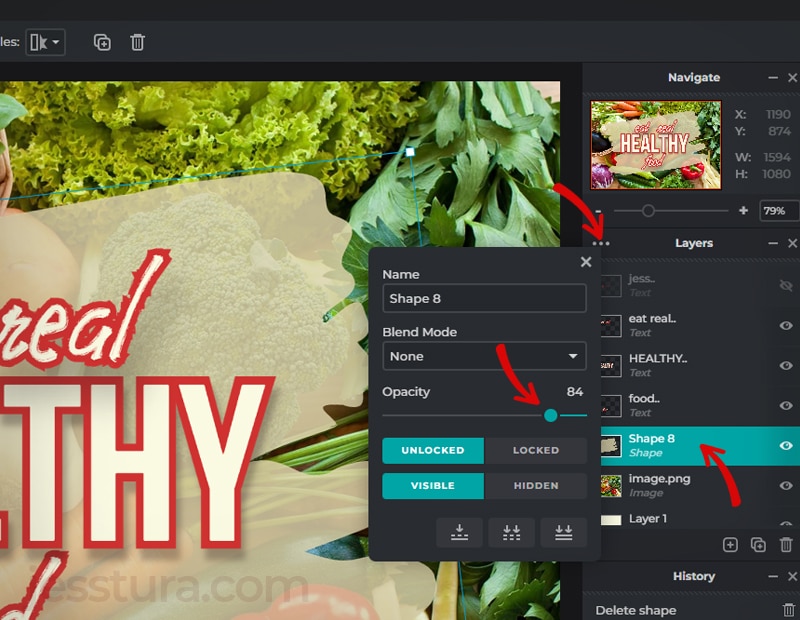
Also, make sure to arrange the layers in such a way that the texts are above the shape and image.
Don’t forget to write your name somewhere in your design. 🙂
Step 6: Save and download your work
Pixlr E saves your work automatically. But just in case you want a JPEG copy of your work, you need to save as JPEG and download it.

The PXZ (pointed by the yellow arrow) is the native editing file format of Pixlr E, it’s kind of psd file in Photoshop. If you want to work with the same file from other computer, you have to download your work as PXZ, and open that file from the other computer.
That’s all!