
The basic steps to install a font on a Windows PC are the following:
- Copy the font file(s)
- Paste the font file(s) to the Fonts folder. That’s it.
Here is an example of how to do that with the font file coming from the Google Fonts website. You must have an admin account to do this.
Step 1: Go to the Google Fonts website
Go to the Google Fonts website (or it can be any font repository website you like).
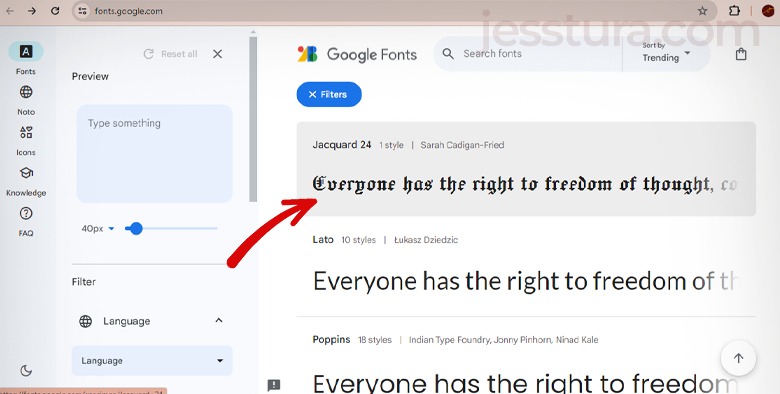
Step 2: Select the font you like
Click the font you like from the list, or you may use the Search box as well, then click your chosen font.
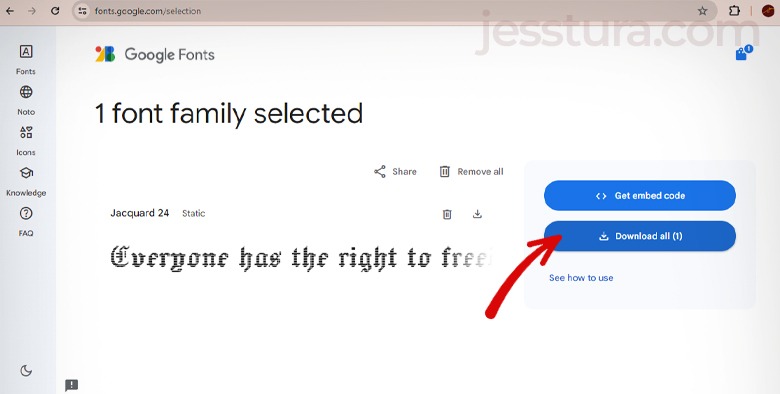
Step 3: Download the font
Click the Get Font button then click the Download All button to download the font. Those buttons are usually on the upper right side of your screen.

Step 4: Locate the downloaded zipped file
Normally, the downloaded file is zipped and it’s in the Downloads folder, so go to the Downloads folder. If you are using Google Chrome, click the Download icon and then the Folder icon as seen in the image below.

Alternatively, you can also open your File Explorer and go to the Downloads folder.
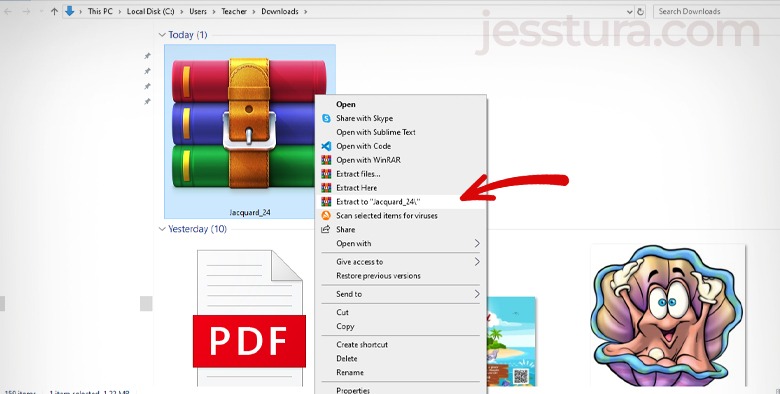
Step 5: Unzip or extract the downloaded zipped file
You cannot use this zipped file yet. You have to unzip or extract it first.
Follow the next instructions if your computer has WinRar installed (or similar to that application).
Right-click the zipped file, then click Extract to..
If your computer has no WinRar installed, right-click the zipped file then click Extract All.
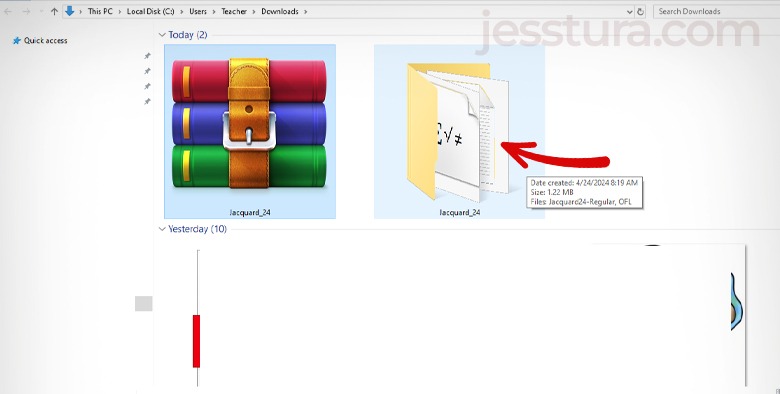
It will then make a new folder where the font files are. Open that folder by double-clicking it.
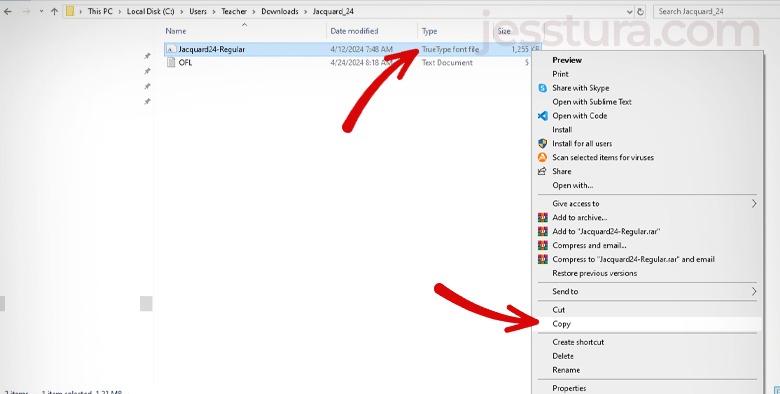
Step 6: Copy only the font file
Select only the font files in the folder, then right-click and copy it.
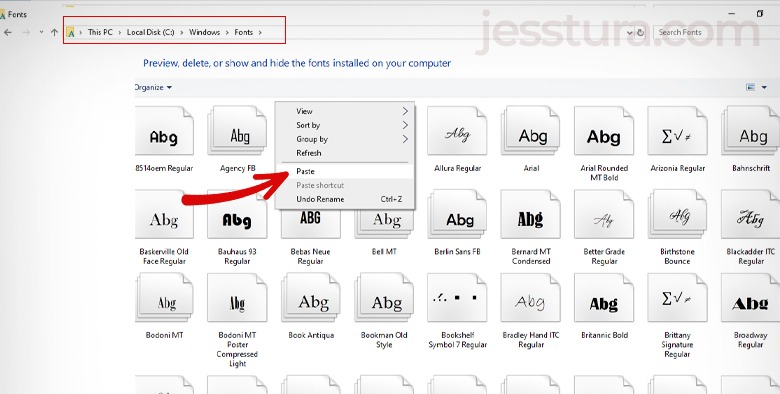
Step 6: Paste the font file(s) inside the Windows’ Font folder.
Go to your computer’s Fonts folder. It is usually in C:\Windows\Fonts, then Paste the font file in there.
Alternatively, you may also drag and drop the font file to the Fonts folder of your computer. Normally, you should see an “Installing fonts…” message on the screen while the computer is pasting the file(s).
After that, the font file should now be added to your computer’s font list. Done!
You may now open your favorite program such as Adobe Photoshop or Microsoft Word to use the font you just installed.